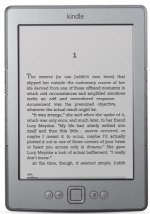
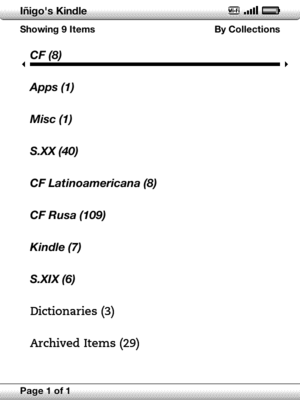
Screenshot from Kindle 4 ereader
I bought a Kindle 4 ereader last November, when Amazon started selling this model in Spain.
I already own another couple of ereaders — and in fact I’m still in love with the IREX DR800, but as IREX is now out of business I don’t want to risk the integrity of this marvellous 8” device as I think it’s still the best ereader out there —. Well, I digress… Anyway, I wanted a cheap and small ereader to carry everywhere, so I got a Kindle 4.
After some months using it — I must admit it’s better than I thought initially — I read a jailbreak was already available…
Thus, I spent some hours past weekend hacking it, jailbreak, installing some third party applications and building a cross compiler toolchain. By the way, if you have ebooks in formats not supported natively by Kindle (.fb2, .epub, .chm…) and don’t like the idea of converting to .mobi format, CoolReader 3 is a must.
But I won’t talk about it now. Today we’ll write a tiny python script to convert Kindle 4 screenshots to png format.
Important
Note this script only works for Kindle 4, you should need to modify it to adapt for other models. More information on this later.
Getting the image
In order to use this you need ssh shell access to the Kindle, first to get the screenshot and then to transfer the file to your computer. Both wifi or usbnet work.
To get a copy of the screen display we can read directly from the framebuffer device. Type this command from the Kindle shell:
# dd if=/dev/fb0 of=./screenshot.raw bs=600 count=800
Note 600x800 is the resolution of Kindle 4 screen.
Then copy the file screenshot.raw to your computer.
The script
The image we got in previous step is in raw format with no information about internal colors, rows or columns. That’s why it can’t be opened with your image viewer program [1].
Kindle 4 uses 8 bits (i.e. 1 byte) per pixel [2], so in our case the processing is quite easy, we don’t need to mess with bits shifting.
1 2 3 4 5 | SIZE = (600, 800)
data = open('screenshot.raw', 'rb').read()
img = Image.frombuffer('L', SIZE, data, 'raw', 'L', 0, 1)
img = ImageOps.invert(img)
img.save('screenshot.png', 'PNG')
|
Let’s explain:
- Image size definition
- Read the image raw data from screenshot file
- Create an Image object using Python Image Library:
- L means 8-bit pixels, black and white
- we need to specify number of columns and rows. Remember data has no format, it contains plain bytes
- raw indicates image comes as raw bytes
- We need to invert colours, black to white and vice versa
- Finally, save image as PNG file
For more information consult PIL documentation.
Note that if you prefer to use the currently deprecated compact syntax of Image.frombuffer (line #3 below) you’ll need to flip the image (line 4), as it is read up-down.
1 2 3 4 5 6 | SIZE = (600, 800)
data = open('screenshot.raw', 'rb').read()
img = Image.frombuffer('L', SIZE, data)
img = img.transpose(Image.FLIP_TOP_BOTTOM) # or img = ImageOps.flip(img)
img = ImageOps.invert(img)
img.save('screenshot.png', 'PNG')
|
You can download the complete script from here.
A resized screenshot as an example:
Note
I’ve just discovered there is a keyboard shortcut to make a screenshots in Kindle 4: press and hold keyboard button then press menu button. Screenshot will be created as .gif files in documents folder.
More tips: http://www.mobileread.com/forums/showthread.php?p=1769412#post1769412
Footnotes
| [1] | Yes, I’m aware of some programs that let you specify some parameters of the raw image to open it. |
| [2] | In fact Kindle 4 uses 8 bits, but the 4 lower bits are copied in the higher 4 bits. Kindle 3 and older use 4 bits per pixel. More information on MobileRead forum. |